As we have mentioned in various articles, one of the reasons for the popularity of sandwich panels in various industries is their simplicity and ease of installation (Suggestion: Check out the Sandwich Panel page). Sandwich panel types have different installation steps. Although this is easy and quick to do, installing sandwich panels requires a high level of expertise and skill and is best done by expert technicians. In this article, we will teach you how to install sandwich panels. Stay with us.
Sandwich panel installation steps
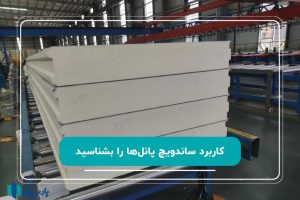
Sandwich panels are divided into two types in terms of application: ceiling and wall. The steps for installing wall sandwich panels and ceiling sandwich panels are different, which we will discuss separately below. Among the common steps in installing sandwich panels is making a suitable foundation and welding the profiles together.
Steps to install ceiling sandwich panels
Roof sandwich panels are used only for roof covering and have trapezoidal pitches. These sandwich panels are connected to the building in a transverse and longitudinal manner with the help of special gutters that are 1.5 or 2 mm thick. These gutters are also connected with rivets at intervals of 25 to 30 cm.
- When installing ceiling sandwich panels, attention should be paid to the structure implemented on the ceiling and the distance between the main supports.
- After proper substructure is done, the sandwich panels are placed on the purlins in the ceiling. One galvanized screw should be used for each square meter of ceiling sandwich panels.
- Roof sandwich panels are laid in an overlapping manner. This arrangement prevents water from penetrating the roof and is very important.
- This completes the installation of the ceiling sandwich panels, but it is better to use flashing and eaves sheets in the final stage for further beautification and sealing.
Steps to install wall sandwich panels
In installing wall sandwich panels, proper foundation must first be made. One of the most important things in installing wall sandwich panels is paying attention to the structure of the building, the distance between the columns at the installation site, the height of the panels, and the wind direction.
- To install sandwich wall panels, you must first build a solid support for the sandwich panels with iron profiles. Sandwich wall panels are installed in two ways: vertically and horizontally, the choice of which depends on the conditions of the installation site.
- If there is to be a door or window in the facade, its location must be determined in the substructure and on the sandwich panels.
- In the next step, the door and window openings are carefully cut out on the wall sandwich panels, and in the final step, these sandwich panels are installed.
- Usually, after installation, the connection between the sandwich panel and the building is secured with special screws. A special tool called a seasoned nail gun is used to install wall sandwich panels.
- There is an important point in installing wall sandwich panels, and that is that in the last step and after the work is completed, the inside of the gutters should be insulated with polyurethane spray.
Installing a sandwich panel with locks
In this type of sandwich panel, there are tabs at the connection of the blocks that connect the panels together. This type of panel is often used in the construction of cold storage.
Installing male and female sandwich panels
In this type of sandwich panels, there are angles at the joints that become a single unit after being connected. These panels are installed on the ceiling or wall with screws.
Installing hidden screw sandwich panels
These types of sandwich panels have a remarkable aesthetic appeal because the connection screws are hidden. When installing these panels, after placing each panel in place, the next panel must be placed in such a way that it covers the screw of the previous panel well.
The most important points for installing various types of sandwich panels
- Building a proper foundation helps sandwich panels fit well on steel structures or concrete skeletons.
- When installing sandwich wall panels, it is very important to pay attention to the layout.
- During installation, attention should be paid to the distance between the panels and the position of the trapezoidal steps to provide good support for tightening the screws and strengthening the connections.
- Special washer screws are used to install sandwich panels.
- Roof sandwich panels are screwed onto a special purlin during installation.
- To strengthen and extend the life of the sandwich panel installation, use one galvanized head screw per square meter of panel.
- After completing the installation, be sure to use silicone glue or single-sided tape to cover the seams.
- Sandwich wall panels are connected male and female, so it is necessary to secure it with galvanized head screws after installation in the appropriate location.
- Choosing the right location for the flashing and eaves sheets in the installation of the ceiling sandwich panel not only creates a more beautiful appearance, but also seals the ceiling.
- When installing ceiling panels, the distance between two panels is very important. It is best to have the overlap panel on the first step of the next panel in the right place.
summary
As we mentioned in this article, installing sandwich panels is not only very quick and easy, but also has very important points that, if followed, will contribute to the beauty and proper insulation of the structure. This is why it is recommended that the installation of wall and ceiling sandwich panels be carried out by skilled and experienced workers.
Using the required equipment, providing infrastructure, familiarizing yourself with cutting devices, observing installation rules and the type of arrangement of various sandwich panels, insulation and sealing are among the things that must be paid attention to when installing various sandwich panels.